Difference between revisions of "Geeetech A10"
| Line 114: | Line 114: | ||
* https://www.geeetech.com/forum/viewforum.php?f=98 | * https://www.geeetech.com/forum/viewforum.php?f=98 | ||
| + | == Using with Cura == | ||
| + | For adding your Geeetech A10 printer to {{Link|target=Cura}} see https://www.geeetech.com/forum/viewtopic.php?t=61568 | ||
== Contact == | == Contact == | ||
https://www.geeetech.com/technical_support.html | https://www.geeetech.com/technical_support.html | ||
| Line 127: | Line 129: | ||
Wolfgang | Wolfgang | ||
</pre> | </pre> | ||
| + | |||
= Upgrades = | = Upgrades = | ||
<youtube>6U8zrePDt5Y</youtube> | <youtube>6U8zrePDt5Y</youtube> | ||
Revision as of 06:08, 11 June 2019
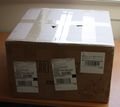
Unboxing and Assembly
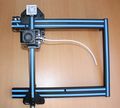
Assembling the Printer and getting to the Bootscreen on the LCD Panel took some 3 hours including documenting this with a camera and looking for ways to solve detail problems.
The first 1-2 hours went smooth unpacking and following the three different videos below. The videos mostly do not show some important details like
- selecting the correct screws
- attaching the display cable correctly
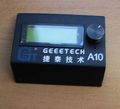
After two hours I contacted support since the display didn't work correctly. I then figured it out my self. I had to detach the display from its metal mount to get better access to the connector to fit the cable properly aligned. In my opion the cable is just
- a bit too short
- a bit too flimsy
- and the connection is not properly documented
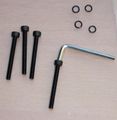
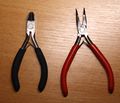
Parts and Tools
Unboxing and Assembly videos
The first video has more details than the other two!
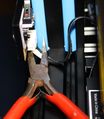
LCD Connector
https://www.geeetech.com/forum/viewtopic.php?t=61603 See pictures below for the fix
Example
ls -l
-rwxrwxrwx  1 wf  staff  9039257 Jun 27  2018 A10_dog.gcode
First Printout
The filament supplied with the printer is not sufficient to print the example Dog and it would take a few hours to get that printed. We therefore use the example from our BlocksCAD page setting the size to 5 which will lead to a small 2 g knot that can be printed in 10 minutes. You'll find the gcode file on our Cura page.
- https://www.geeetech.com/forum/viewtopic.php?t=61568 has a link to the Geeetech A10 printer definition for Cura.
On my Mac I had to put this into the folder /Applications/Ultimaker Cura.app/Contents/Resources/resources/definitions
Filament Sensor Setting and Print Preparation
See http://marlinfw.org/docs/features/lcd_menu.html
Please note that the E in mm3 needs to be off for 1.75 mm diameter PLA. The correct volumetric setting for PLA is different.
First Usage experience
At 3D_Print_Problems i have documented some of the issues I had during the first few printouts.
USB Connection
see https://www.geeetech.com/forum/viewtopic.php?t=60612
Mac OS
system_profiler SPUSBDataType
USB2.0-Serial:

                  Product ID: 0x7523
                  Vendor ID: 0x1a86
                  Version: 2.63
                  Speed: Up to 12 Mb/sec
                  Location ID: 0xfd343000 / 16
                  Current Available (mA): 500
                  Extra Operating Current (mA): 0
So it's a CH340 Download Driver from http://www.wch.cn/download/CH341SER_MAC_ZIP.html and install. Cura will then recognize the printer and allow to use the USB connection for monitoring, controlling and printing.
Support
Wiki
Forum
Using with Cura
For adding your Geeetech A10 printer to Cura see https://www.geeetech.com/forum/viewtopic.php?t=61568
Contact
https://www.geeetech.com/technical_support.html
Dear Geeetech support,
after assembling the device see http://wiki.bitplan.com/index.php/Geeetech_A10
the display only has lit backlight but does not show any characters.
Please advise.

I am looking forward to your response.

Cheers
  Wolfgang
Upgrades

