Geeetech A10
Unboxing and Assembly
Assembling the Printer and getting to the Bootscreen on the LCD Panel took some 3 hours including documenting this with a camera and looking for ways to solve detail problems.
The first 1-2 hours went smooth unpacking and following the three different videos below. The videos mostly do not show some important details like
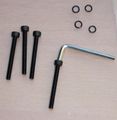
- selecting the correct screws
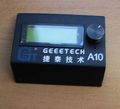
- attaching the display cable correctly
After two hours I contacted support since the display didn't work correctly. I then figured it out my self. I had to detach the display from its metal mount to get better access to the connector to fit the cable properly aligned. In my opion the cable is just
- a bit too short
- a bit too flimsy
- and the connection is not properly documented
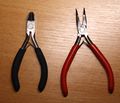
Parts and Tools
Unboxing and Assembly videos
The first video has more details than the other two!
LCD Connector
https://www.geeetech.com/forum/viewtopic.php?t=61603 See pictures below for the fix
Example
ls -l
-rwxrwxrwx  1 wf  staff  9039257 Jun 27  2018 A10_dog.gcode
First Printout
The filament supplied with the printer is not sufficient to print the example Dog and it would take a few hours to get that printed. We therefore use the example from our BlocksCAD page setting the size to 5 which will lead to a small 2 g knot that can be printed in 10 minutes. You'll find the gcode file on our Cura page.
Support
Wiki
Contact
https://www.geeetech.com/technical_support.html
Dear Geeetech support,
after assembling the device see http://wiki.bitplan.com/index.php/Geeetech_A10
the display only has lit backlight but does not show any characters.
Please advise.

I am looking forward to your response.

Cheers
  Wolfgang

