Difference between revisions of "3D Print Problems"
| Line 66: | Line 66: | ||
For a Geeetech A10 slow down the Y-movement changes | For a Geeetech A10 slow down the Y-movement changes | ||
<pre> | <pre> | ||
| − | Control / | + | Control / Motion / Jerk / Vy-Jerk and specify 10 in place of 20 |
</pre> | </pre> | ||
and store settings ... | and store settings ... | ||
Latest revision as of 14:39, 23 January 2020
General
- https://www.simplify3d.com/support/print-quality-troubleshooting/
- http://www.geeetech.com/blog/2016/12/troubleshooting-guide-to-19-common-3d-printing-problemspart-one/
Checklist
Some of the problems described here can be avoided by observing the 3D Print Checklist
Print Aborted
Running out of filament
The amount of initial filiament shipped with my Geeetech_A10 was simply not enough to finish the print job:

Rebooting computer while USB is connected
When installing a new USB driver the computer rebooted - it's probably the same if you unplug and plug the USB cable while printing from SD card:

Underextrusion
See e.g.
- https://www.raise3d.com/pages/extruding-too-little-much-plastic
- https://ultimaker.com/en/resources/21477-how-to-fix-under-extrusion
in my case it happened when I set the Filament settings in the marlin menu with "E in mm3" to 1.75. This was a misunderstanding that lead the software to assume my filament was flowing faster than it was. After switching the volumentric value off things were much better. The same will happen if you use the default Material/filament size in Cura which might be wrongly set to 2.85 mm instead of 1.75 mm for the filament you might be using.


The 3D_Print_Testbox print clearly shows the difference:


Clogged Nozzle
See e.g.
Leaking Hotend
See e.g.

This happens e.g. if you change the nozzle and don't tighten the new nozzle enough so that filament can spill thru the gap.
Print stuck to glass / print bed
I had best results with the temperature method in combination with taping the bed before printing. With a minus 17 degree cooling pad from the deep fridge below the glas bed and a gentle stroke with the rubber hammer the problem usually went away within a minute.
Stringing
see e.g.

Slight stringing can simply be sanded off:

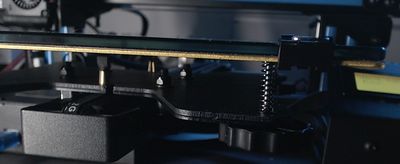
Shifting layers / Layer shifting


- https://help.prusa3d.com/article/v40kdhc9rk-layer-shifting
- https://forums.matterhackers.com/topic/76/how-to-fix-shifting-layers
- https://www.geeetech.com/forum/viewtopic.php?p=87959&sid=1f0175e82a10a863b927e1272ffdb257
Potential fix
For a Geeetech A10 slow down the Y-movement changes
Control / Motion / Jerk / Vy-Jerk and specify 10 in place of 20
and store settings ...
Changing filament
Broken Filament Detector
Changing Teflon tube
Pillowing
- https://all3dp.com/2/3d-printing-top-layer-problems-easy-fixes-for-pillowing/
- https://rigid.ink/blogs/news/pillowing-stringing-and-splitting-what-they-are-and-how-to-stop-them
- https://www.raise3d.com/pages/holes-and-gaps-in-solid-layers
Bed Leveling
Geeetech A10 Bed Leveling
Initial bed leveling
Get a piece of 80g/m² paper ready.
- The glass plate should be will fixed with fold back clips. Especially the left rear corner might need two clips. Foldback the bottom clip and remove the top one for the clips pointing to the left. Make sue the clips are far enough away from the position where the extruder will be in the corner test below.
- Auto Home from the Marlin menu: Prepare/Auto home

- Preheat your Extruder: Prepare/Preheat PLA/Preheat PLA (or only Preheat PLA End -if you don't want a warm bed while working)
- You might want to loosen all four bed leveling screws until you feel no more resistance - do not turn much further or the screws will come completly off.
 Looking from the top you turn the screws clockwise. Your hands have to move counter-clockwise since the screws are below the plate. This will bring the print bed as high as it gets. The springs below the bed are fully extended.
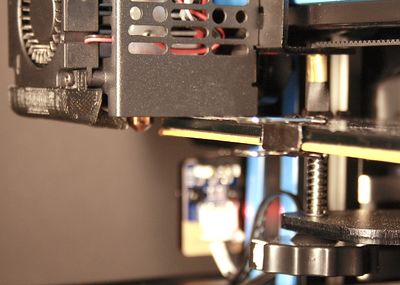 The extruder nozzle is below the plate and the metal case of the extruder is just touching the bed.
 - Tighten all four screws by the same number of turns (I have marked my screws with white spots to ease this process) until the alignment of the extruder looks visually ok. It should be just above the print bed. The tightened screws will bring the print bed down a bit again and if all is well it should be level already. You'll have to try out what a suitable amount of full turns is and you can remember it for future levellings. I am currently experimenting with 8 to 10 turns.
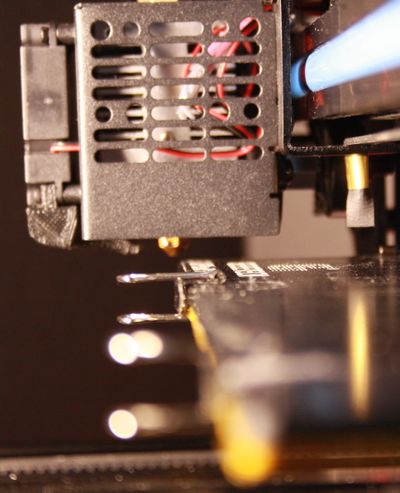
- Start the leveling procedure from the Marlin menu: Prepare/Level corners. Make sure the paper is squeezed by the extruder in the corresponding corner. The difference between "squeezed" and "loose" should be only some 1/8 of a turn of the screw. In the first "round" - 4 x time "next corner"
 tighten the screws until you feel some resistance from the screws. Don't worry about the amount of resistance of the paper on top yet - it should just be in that 1/8 range between loose and tight.
 - Now do more 4 x time "next corner" steps until the result is satisfactory. The resistance on the paper is decreased by turning the screws counter-clockwise (moving your hand clockwise). The paper should just not move freely - a little bit of "rest-resistance" should be feelable.


Testing with some gcode

The front left corner ist not o.k.
Support
https://pinshape.com/blog/dotm-fantasy-graph-3d-printer-support-structures/
Speed
Speed, Quality, Strength, Cost - pick any two ...
Support break down
Test Cube
See 3D Print Testbox
Extruder Calibration